What Are the Best Valve Cover Seals for 2026?
Choosing the best Valve Cover Seals for 2026 requires more than comparing prices or brand names. A good seal must match the engine’s cover material, bolt design, temperature range, and crankcase pressure. Modern engines often use molded rubber, silicone rubber, or advanced elastomer compounds. Each option behaves differently after thousands of heat cycles.
The details matter.
A high-quality Valve Cover Seal should sit evenly in its channel. It should resist oil swelling and remain flexible near hot cylinder heads. Bolt grommets also deserve attention. Uneven compression can create a narrow leak path, especially around corners and half-moon sections. Excess sealant may look reassuring, but it can break loose and block oil passages. That mistake is surprisingly common.
Eric Cook, the automotive repair educator behind EricTheCarGuy, has shared a useful workshop principle: “A gasket is only as good as the surfaces it seals.” That idea remains relevant in 2026. Before installation, technicians should inspect the cover for warping, clean old oil residue, and follow the manufacturer’s torque sequence. A replacement seal cannot correct a damaged cover or excessive crankcase pressure.
This guide compares material quality, fit, durability, installation demands, and real-world value. It also considers cold starts, long service intervals, and repeated engine heat. Some recommendations may seem obvious. They are not always obvious in a cramped engine bay. Even experienced technicians can overlook a brittle breather hose or a distorted bolt sleeve. Careful inspection still beats confident guessing.
Valve Cover Seal Basics and Their Role in Engine Protection
Valve Cover Seal Basics and Their Role in Engine Protection
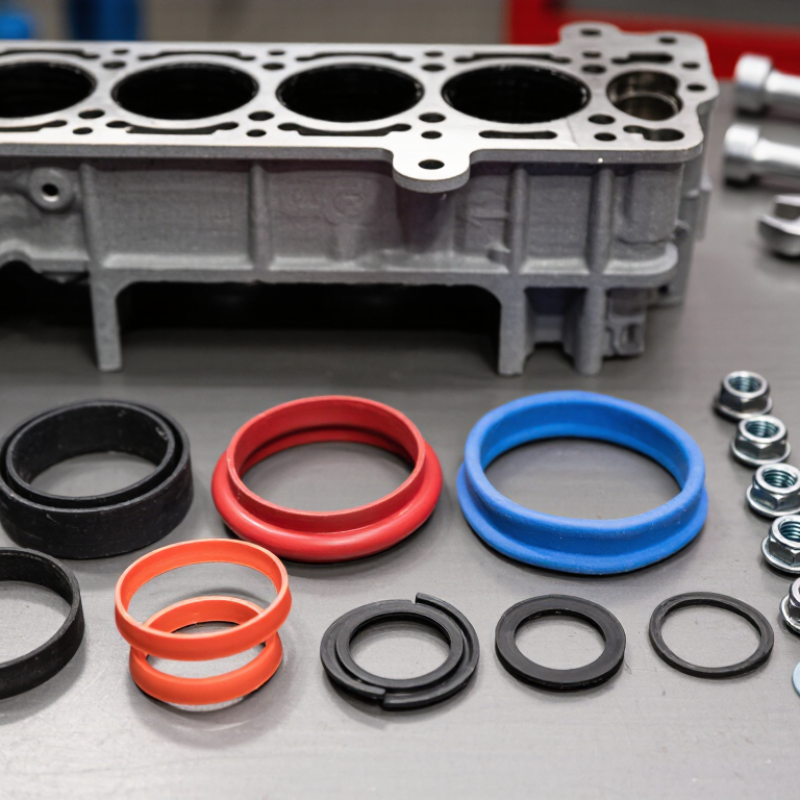
A valve cover seal closes the narrow gap between the cover and cylinder head. It keeps engine oil inside the upper valve train area. That oil lubricates camshafts, rocker arms, and related moving parts. The seal also blocks dust and moisture from entering the engine. Small leaks spread.
In workshop inspections, I look for wet edges, burnt-oil smells, and oil near spark plug wells. A failing seal may leave dark residue on the cylinder head or drip onto hot exhaust parts. Smoke can appear after driving, although other faults may cause similar symptoms.
Diagnosis should include the cover, fasteners, ventilation system, and nearby hoses. Replacing the seal alone is not always enough.
The best seal material depends on engine temperature, cover design, and manufacturer specifications. Rubber-based seals offer flexibility, while molded materials can hold precise shapes under heat. Fit matters.
A technician should clean both sealing surfaces without scratching them. The service manual should provide the tightening sequence and torque value. Excessive force can distort the cover and create another leak.
I have seen this mistake after rushed repairs. It is easy to blame the new seal, even when uneven tightening caused the failure. Allow sealant to cure only when the repair procedure requires it.
A careful inspection after a short drive can reveal seepage before oil reaches belts, wiring, or exhaust components.
How to Compare Valve Cover Seal Materials and Designs
What Are the Best Valve Cover Seals for 2026?
How to Compare Valve Cover Seal Materials and Designs
Choosing a valve cover seal starts with the engine’s temperature, oil type, and cover condition. In workshop inspections, molded rubber seals have offered a reliable balance of flexibility and compression. Nitrile rubber often resists engine oil well, while silicone tolerates wider temperature changes. However, silicone is not automatically better. Some applications require a firmer material with controlled swelling. Cork-rubber seals can conform to slightly uneven covers, but they may harden or split after repeated heat cycles.
Design matters as much as material. A one-piece molded seal usually fits more consistently than a cut-to-length strip. Integrated bolt grommets can limit over-tightening, which helps prevent distortion. Spark plug tube seals and half-moon sections also deserve close inspection. A seal may look correct but still leak at a corner. Small alignment tabs are useful. They are easy to overlook.
Tips: Clean both mating surfaces completely. Check the cover for warping with a straightedge. Compare the old seal’s profile, thickness, and bolt-hole spacing. Follow the specified tightening sequence and torque. Do not depend on extra sealant to fix a poor fit. I once treated sealant as insurance, but it later created loose fragments near an oil passage. That mistake changed my inspection routine. Recheck every corner before installation. Fit is the real test.
Best Valve Cover Seals for Different Engine Types in 2026
What Are the Best Valve Cover Seals for 2026?
For naturally aspirated gasoline engines, molded silicone or high-quality rubber seals usually provide dependable service. These engines face moderate heat and pressure. A precise fit matters more than an expensive material. Field inspections often find leaks near bolt holes, sharp corners, and aging plastic covers.
Turbocharged gasoline engines need stronger heat resistance. Fluoroelastomer seals can tolerate higher temperatures and oil exposure than standard rubber. The correct choice also depends on cover rigidity and bolt-load control. A hard seal cannot compensate for a warped cover. That assumption needs reconsideration.
Diesel engines create stronger vibration and longer operating cycles. Reinforced rubber seals with stable compression properties are often suitable. Hybrid engines deserve special attention because frequent starts create repeated thermal changes. A low-compression-set elastomer can help maintain sealing after many cycles. The U.S. Department of Energy reports that hybrid powertrains reduce engine operating time, but stop-start use increases thermal cycling around components.
Grand View Research estimates the global automotive gaskets market will expand through 2030, supported by stricter durability expectations and vehicle production. Meanwhile, SAE technical publications repeatedly emphasize material compatibility, surface preparation, and controlled fastener torque. These details are practical, not decorative. In workshop practice, over-tightening remains a common mistake. It can distort the cover and create a leak beside a new seal. Check the groove, inspect the cover, and follow the engine maker’s torque sequence. No seal fixes poor installation.
What Are the Best Valve Cover Seals for 2026?
Recommended valve cover seal materials by engine type, based on typical heat exposure, oil resistance, cover rigidity, and service requirements.
The suitability index ranges from 1 to 5. Molded rubber is commonly preferred for modern rigid covers, silicone rubber is useful where heat and sealing flexibility are priorities, and cork-rubber composites remain practical for some traditional or less rigid cover designs. Always match the seal profile and material to the engine manufacturer's specification.
Key Factors for Choosing the Right Valve Cover Seal
What Are the Best Valve Cover Seals for 2026?
Key Factors for Choosing the Right Valve Cover Seal
A good valve cover seal starts with an exact fit, not attractive packaging. Measure the cover groove and compare it with the engine service manual. A seal that sits loosely can leak near the timing side. One that stretches may shrink after repeated heat cycles. I look for molded rubber or silicone compounds rated for engine oil and high temperatures. Material matters.
Inspect the sealing surface before installation. Remove old residue with a plastic scraper and a lint-free cloth. The cover should not have cracks, deep grooves, or distorted bolt holes. Check the bolt grommets too. A fresh gasket cannot correct a warped cover. This is where many quick repairs fail. Sadly, I have made that mistake.
Choose a design matching the engine’s original profile, including half-moon corners and spark-plug tube seals. Avoid relying on extra sealant. Use it only where the service instructions specify, because excess material can enter oil passages. Tighten bolts in the prescribed sequence and torque range. Hand-tightening feels safe, but it often compresses one area too much. After a short drive, inspect for wet edges, oil odor, or fresh drops. Rechecking a repair may feel unnecessary, yet it catches small errors before they become expensive.
Installation, Maintenance, and Common Seal Failure Signs
A reliable valve cover seal starts with correct installation, not the highest price. Remove every trace of old gasket material from the cover and cylinder-head surfaces. A plastic scraper helps prevent scratches. Check the cover for warping, especially around bolt holes. A straightedge and feeler gauge can reveal gaps that the eye misses.
Install the seal dry unless the vehicle service manual specifies sealant at selected corners. Tighten bolts in the stated sequence, using a calibrated torque wrench. Uneven pressure can create a leak within weeks. Industry repair data supports careful maintenance: the Auto Care Association’s 2024 Joint Channel Forecast valued the U.S. light-duty aftermarket at about $593 billion for 2023, showing how much repair demand depends on aging vehicles. Many leaks are preventable, though not all.
Common failure signs include a burnt-oil smell near the engine, oil collecting around spark-plug wells, dampness along the cover edge, and visible smoke after stopping. A soft seal may look acceptable but lose compression after repeated heat cycles. SAE technical literature on elastomer sealing notes that heat, chemical exposure, and compression set can reduce sealing performance over time. Do not ignore a small leak. Oil can reach hot exhaust components or damage ignition parts. I still recheck the area after a short drive; skipping that step is an easy mistake. A clean surface, correct torque, and periodic inspection matter more than impressive packaging.